
Before installing ceramics to do this work, you must first know what equipment must be used, when the equipment is complete, the work can run easily, planned, and certainly get the results as desired, along with the materials and equipment that must be prepared including:
- Calculate the number of ceramics according to the room to be installed, this purpose is so that the ceramics needed are not too far from the estimate
- Then use adhesive material
- For equipment use: rubber hammer, wet saw, waterpass, shovel, measuring gauge, nail hammer, ceramic adhesive, elbow meter, ceramic clamp, thread, tile laveling, nails, wood, foam, notched shovel, unused flip-flops.
After the equipment is prepared, the initial steps that need to be known when installing tiled floors are as follows:
- Clean all surfaces of the room to be clean, dry, neat, and even, then determine the layout by forming a square frame using wood and given nails on top tie the thread on the nail and then spread it towards other wood that has been attached to the nail as well, the function of this thread is to measure its straightness
- Then sprinkle the sand evenly and then the cement dough and sand are placed on top, flattened again
- Before installing ceramics, ceramics are soaked in water first, this is so that at the time of installation the ceramics will be easier to stick and the ceramics can also absorb water for a soaking time of approximately 30 minutes.
- The ceramics that will be installed one by one at the bottom are coated with cement dough only, this is used to quickly stick.
- When installing ceramics, use tile laveling tools and rubber hammers, to fit even more evenly, the advantages of using this tile laveling if the mortar shrinks, it will remain flat and the use of rubber hammers is by tapping slowly on the ceramic so that the results are good and for the distance between the two ceramic grout is tried to be a bit tenuous, so that the tool can enter the grout gap
- After the ceramics are thoroughly installed in the wooden frame, the wood can be removed and reinstall the ceramics on the edges this way is used so that the floor installation looks neat, and easy, then for parts that have not been installed ceramics are measured again and can start installing them again
- For the very bottom of the wall is flattened and tidied up and then given water then reattach the ceramics as usual, the function of installing these wall tiles if they are being cleaned using a mop will not hit the wall, if the interior paint of the wall is exposed to water continuously it will peel off and will reduce the beauty of the room.
- When the ceramics are installed, it usually takes at least 24 hours before stepping on the newly installed ceramics or it can also be by waiting for 48-72 hours.
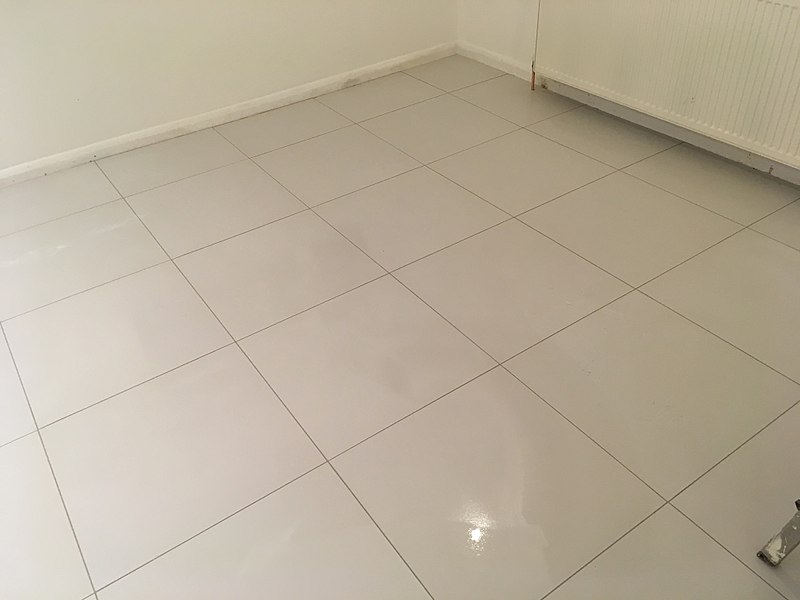
After the installation of the ceramic floor is neatly and flat and can be stepped on, the next step is the provision of grout, grout filling is very important because grout is a gap filler between ceramics used to seal voids that are deliberately vacated between floor tiles, and the function of the grout itself has several functions including:
- Helps the uniformity of the floor, because the ceramics are different in size from others, the ceramic non-uniformity occurs, the size will be clearly visible, therefore the filling of this grout will help homogenize the ceramic floor
- Prevent the entry of insects and other small animals.
- Prevent water seepage, if water enters the gap it will be very dangerous for the durability of the floor.
- Determine the strength on the floor
- Add aesthetic value, in order to provide its own aesthetic value, it is necessary to adjust the choice of color and pattern before the ceramic is installed. in order to give the same impression.
The next step after knowing the function of this grout is how to fill ceramic grout, filling this ceramic grout has two versions manually and uses a variety of ready-made products that can be applied directly to the floor with various color choices, while for the manual one, for example, using MU-40B and mixed using a little wood glue or white glue, fox glue to make it stronger, durable and not easy to peel, then make a rather thick dough, but before applying grout to the floor, it needs to be cleaned first such as:
- Cleaning ceramic gaps, for example using a catheter, this aims to reduce the dirt of sand, because if not cleaned it will reduce the adhesion of grout.
- Wipe the floor surface so that the floor is dry and easy to install the grout
- After everything is clean and dry, you can immediately apply the grout filling, you can use flip-flops that are no longer used. by greasing, pressing and leveling grout filling.
- It takes approximately 30 minutes, do not expose to water during the drying process.
- After everything is dry, the last is to clean all the remnants of grout attached to the floor surface using a sponge, cleaning the remaining grout that sticks must be cleaned immediately because if you delay cleaning it will be difficult to clean if it dries.
And the last is the installation of tiger nails, these tiger nails have a function to add beauty and to avoid sharpness in installation, many variations of colors and motifs, tiger nails are installed on ceramic edges for example in bathrooms, bedrooms, terraces and so on.
The installation of this tiger nail, has a thickness of 2cm, a length of 10cm, and has many different sizes and for how to install it is using slightly thick skim cement, then the tiger nail is installed and tapped using a rubber hammer and to facilitate cleaning the remnants of cement can use a sponge.

Leave a comment